Modifying Diffusers
This tutorial teaches you how to modify diffusers on your drawing.
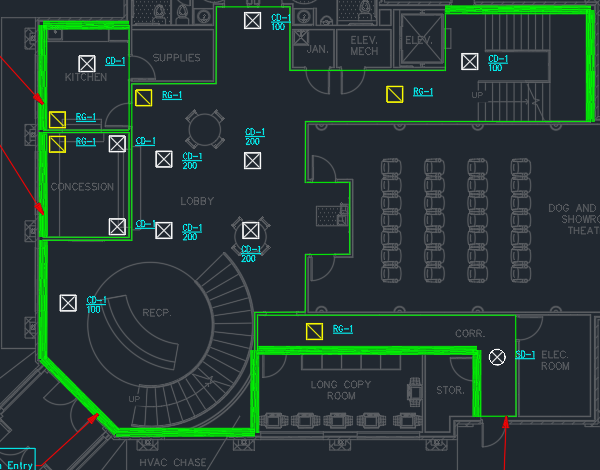
Open drawing M-1.0.
Move a Diffuser
Use the standard CAD MOVE command to move the two CD-1 diffusers on the right side of the lobby, as shown in the image below. You can move the diffuser like any other entity in your CAD program.
Move Diffuser Callouts
-
Run the
Insert or Move Callout command.
Ribbon:DM HVAC→Diffusers→  Insert or Move Callout
Pulldown Menu:DM HVAC→Diffusers→Insert or Move Callout -
Select the lower-right CD-1 diffuser in the lobby.
-
Move the diffuser callout below the diffuser. You can move the callout like any other entity in your CAD program.
Repeat this process for the upper-right CD-1 diffuser in the lobby. Move the diffuser callout above the diffuser.
Change a Single Diffuser
-
Run the
Query Diffuser command.
Ribbon:DM HVAC→Diffusers→  Query Diffuser
Pulldown Menu:DM HVAC→Diffusers→Query Diffuser -
Select the CD-1 diffuser in the corridor on the drawing. The Query Diffuser dialog box will open.
-
Set Callout ☰ to SD-1.
-
Press the button to close the dialog box.
The diffuser on the drawing will be changed from a CD-1 diffuser to an SD-1 diffuser.
Change Multiple Diffusers
-
Run the
Edit Multiple Diffusers command.
Ribbon:DM HVAC→Diffusers→  Edit Multiple Diffusers
Pulldown Menu:DM HVAC→Diffusers→Edit Multiple Diffusers -
Select the group of four CD-1 diffusers in the lobby on the drawing. The Edit Multiple Diffusers dialog box will open.
-
Set CFM to 200.
-
Press the button to close the dialog box.
The airflow of the diffusers on the drawing will be changed from 0 to 200. The callouts will be updated to reflect this value.
Repeat this process to set the CFM of the remaining CD-1 diffusers in the lobby to 100.