This tutorial will teach you how to set up the floors in your project.
For this tutorial, work with the project in the 2-1 Creating Floors folder. Open drawing P1-0.dwg.
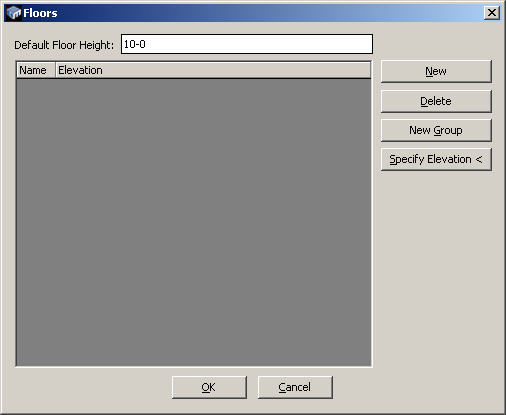
When you start a new project, the Floors dialog is immediately displayed. You must set up floors before you can do anything else in the project. The Floors dialog can also be displayed by selecting:
DM Plumbing ![]() Building Definition
Building Definition ![]() Floors
Floors
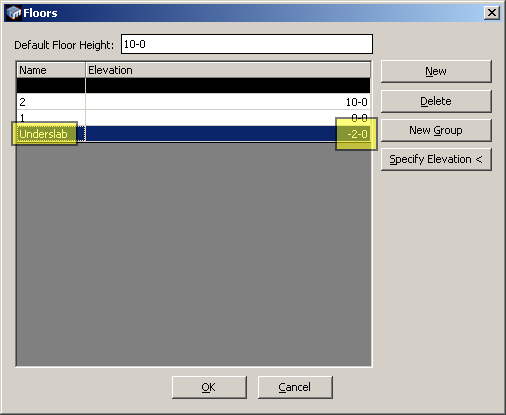
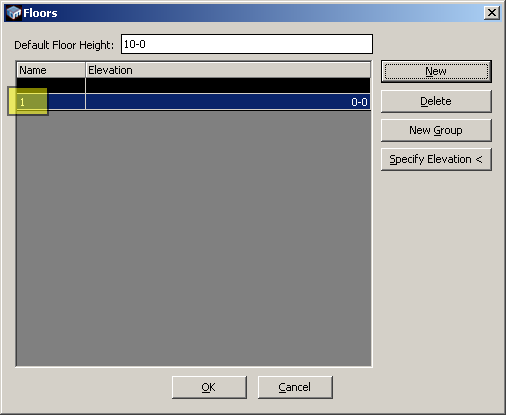
For this tutorial, we will create three floors, Underslab, 1, and 2. Press New to create the floor. Change the name of the first floor to 1.
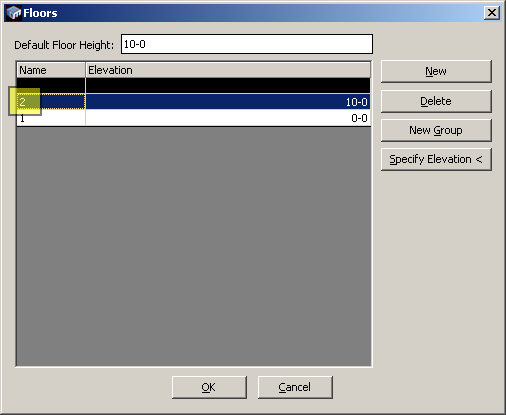
Press New again and change the name for the second floor to 2. The elevation for this floor will automatically be set to 10. The default elevation for new floors is based upon the default floor height. You will want to adjust this in future projects to the actual distance between floors to make setting up floors easier.
Press New again and change the name for the third floor to Underslab. Change the elevation to -2. It will automatically be moved below the other two floors for you.