Light Fixture Master Schedule
The light fixture master schedule contains the light fixture types that could be used by a company in a project. Visit the Master and Standards Databases section for more information about using master databases.
To create and modify light fixtures in the master schedule, go to
Ribbon: ![]() Light Fixture Master Schedule
Light Fixture Master Schedule
Pulldown Menu:
Light Fixture Master Schedule Dialog Box
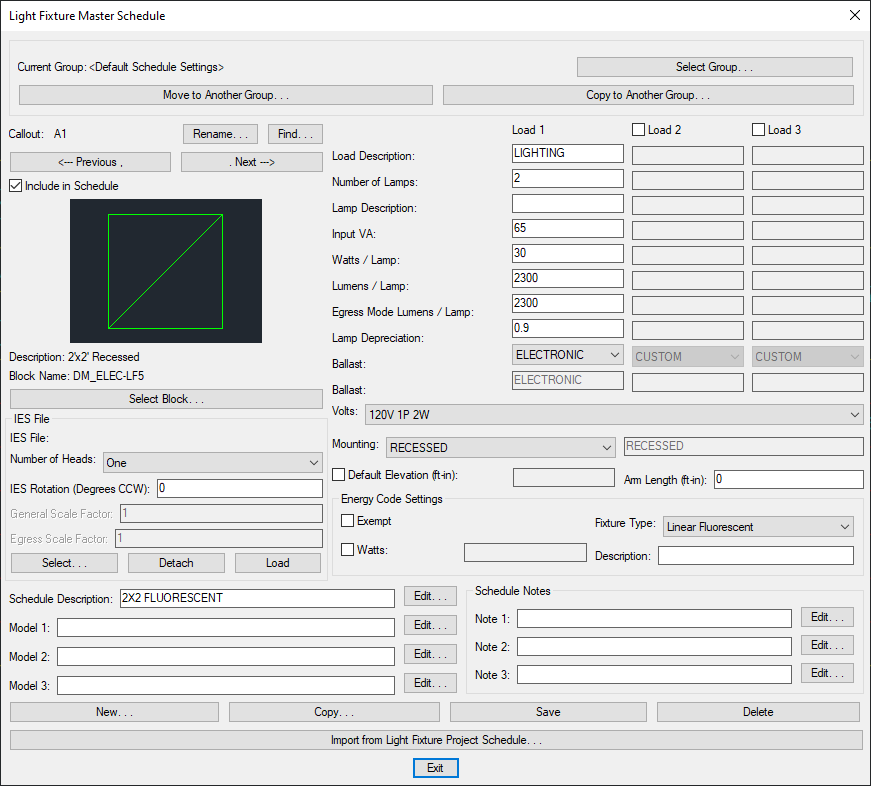
Visit the Common Schedule Dialog Box Features section for more information about how this dialog box works. This section describes the , , , , , , , and buttons.
Visit the Common Light Fixture Information section for more information about the values that can be specified for light fixtures using this dialog box.
Visit the Import from Project Schedule section for more information about importing light fixtures from a project to the master database.
-
Current Group: The active light fixture group is listed here. All of the light fixture types that are created and modified will be associated with this group.
-
Press this button to open the Light Fixture Master Schedule Groups dialog box. The group selected will become the current group. Visit the Schedule Groups section for more information.
-
Press this button to open the Select Light Fixture Block dialog box. This dialog box allows you to choose the block used to represent the light fixture on the drawing.
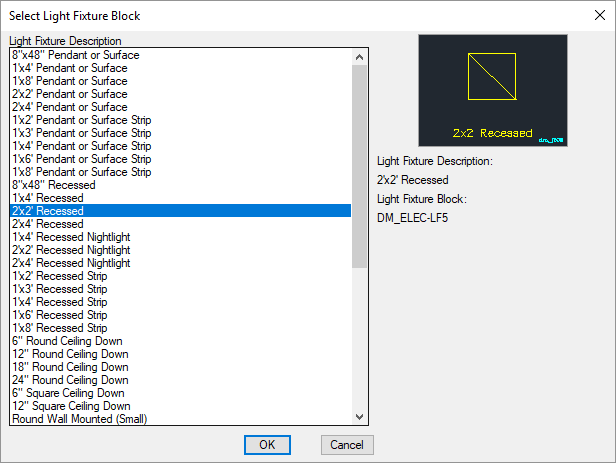
You can add more blocks to this list using the Light Fixture Blocks→Edit Master List command.
-
Press this button to select the IES file for the light fixture. The Select IES File dialog box will open.
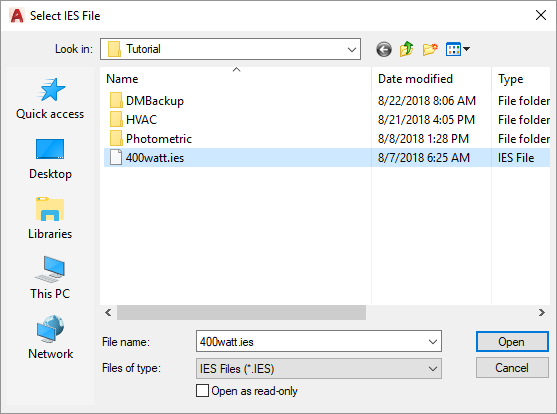
Select the IES file for this light fixture and press the button. The IES file will be attached to this light fixture and you will be asked whether to add information to the schedule.

-
Press this button to add the information to the schedule. The information contained in the IES file varies depending upon what the manufacturer provides. You will need to review the information that is loaded to confirm it is loaded into the correct field and that it contains useful text.
-
Press this button to only add the information from the IES file used for lighting calculations. The other information in the light fixture schedule will not be filled in based upon the information in the IES file.
Once an IES file is attached to a light fixture, the file path is displayed in the IES File field of the dialog box.
-
-
Press this button to detach the IES file from the light fixture. The light fixture will have no IES file associated with it after pressing this button.
-
Press this button to load the IES file information into the schedule. The information contained in the IES file varies depending upon what the manufacturer provides. You will need to review the information that is loaded to confirm it is loaded into the correct field and that it contains useful text.
You will be asked whether to add information to the schedule.
Press the button. All of the information from the IES file will be loaded into the schedule.