Insert Panel Schedule

Inserts panel schedules for one or more pieces of distribution equipment on the drafting view using panel schedule templates defined in the Revit project.
For information about customizing panel schedule templates, visit the Modifying Revit Panel Schedules article in the knowledge base.
You must be in a drafting view to use this command.
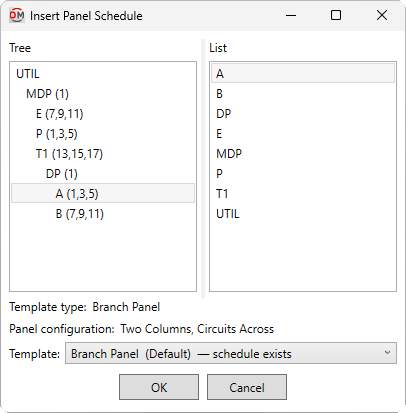
Opens the Insert Panel Schedule dialog box:
Insert Panel Schedule Dialog Box
-
Tree / List ☰ All of the distribution equipment in your project. They are organized based upon the connections in the model, and listed alphabetically. Select the distribution equipment for which the panel schedule will be inserted.
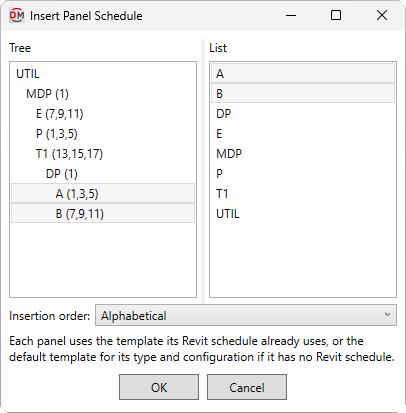
You can select multiple items in the list using the SHIFT or CTRL key. The other fields in the dialog box will be replaced with the following:
- Insertion order: ▾ The order in which panel schedules will be arrayed for the selected distribution equipment.
- Alphabetical Panel schedules will be inserted alphabetically.
- Distribution order Panel schedules will be inserted in the same order as the Tree ☰.
- Insertion order: ▾ The order in which panel schedules will be arrayed for the selected distribution equipment.
-
Template type: The category of panel schedule template that will be used, based upon settings in the distribution equipment family. Visit the Manage Panel Schedule Templates Dialog Box section of the knowledge base for a description of each Template type value.
noteFor Electrical Equipment that have their Part Type ▾ set to Equipment Switch or Transformer, the Switchboard template type will be used.
-
Panel configuration: How the circuit table is configured in the template, based upon settings in the distribution equipment family. Visit the Manage Panel Schedule Templates Dialog Box section of the knowledge base for a description of each Panel configuration ▾ value.
-
Template: ▾ The panel schedule template that will be used, based upon the templates available for the selected Template type and Panel configuration. (Default) indicates the project default template for that combination.
tipIf a Revit panel schedule using the selected template already exists for the selected distribution equipment, schedule exists will be displayed. You can still choose a different template.
Inserting the Panel Schedule on the Drafting View
Press the button to insert the panel schedule. You will be prompted for the insertion location of the schedule.
Specify insertion point for <distribution equipment> schedule:
If you selected one distribution equipment, the location you specify will be used as the top-left corner for the panel schedule.
If you selected multiple distribution equipment, you will then be prompted to specify the maximum width to array the panel schedules on the drafting view.
Specify width of the schedule layout, or press ESC / ENTER to insert as one row:
The top-left corner of the first panel schedule will be inserted at the first specified point. Additional schedules will be inserted in the direction of the specified width, wrapping down when extending past that width.
Spacing between schedules: Sets the distance between panel schedules when inserting multiple schedules.