Defining Partitions
This tutorial teaches you how to define partitions.
You will define wall and floor/ceiling partitions for the long copy room and adjoining storage area.
Open drawing M-1.1.
Create Additional Rooms
-
Run the
Create Room command. The Create New Room dialog box will open.
Ribbon:DM HVAC→Rooms and Walls→  Create Room
Pulldown Menu:DM HVAC→Building Definition→Rooms→Create Room -
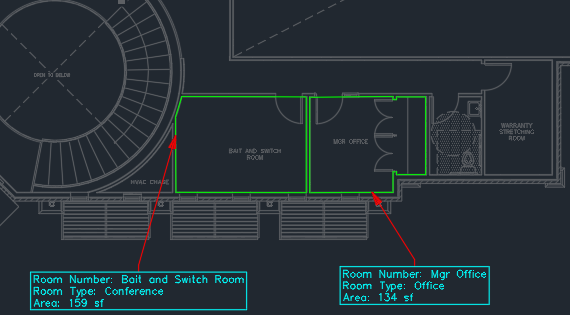
Create the Bait and Switch Room with Room Type ▾ set to Conference and Floor ▾ set to Two.
-
Run the
Create Room command.
Ribbon:DM HVAC→Rooms and Walls→ Create Room
Pulldown Menu:DM HVAC→Building Definition→Rooms→Create Room -
Create the Mgr Office room with Room Type ▾ set to Office and Floor ▾ set to Two.
-
Open drawing M-1.0.
-
Run the
Create Room command.
Ribbon:DM HVAC→Rooms and Walls→ Create Room
Pulldown Menu:DM HVAC→Building Definition→Rooms→Create Room -
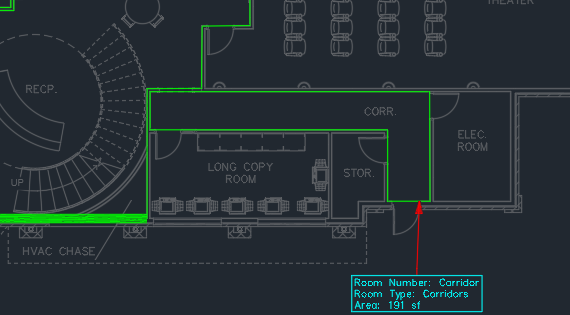
Create the Corridor room with Room Type ▾ set to Corridors.
Insert a Wall Point
To change the definition for part of a wall, insert one or more wall points along the wall.
-
Run the
Insert Wall Point command.
Ribbon:DM HVAC→Rooms and Walls→  Insert Wall Point
Pulldown Menu:DM HVAC→Building Definition→Walls→Insert Wall Point -
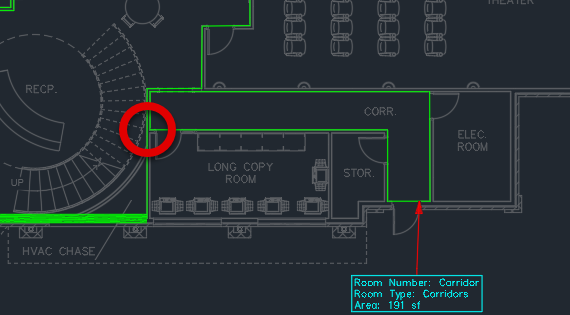
Select the point on the lobby wall where it meets the corridor wall, indicated below.
Define Wall Partitions
-
Run the
Query Wall command.
Ribbon:DM HVAC→Rooms and Walls→  Query Wall
Pulldown Menu:DM HVAC→Building Definition→Walls→Query Wall -
Select any wall adjacent to the long copy room or storage area. The Specific Wall Information dialog box will open.
-
Select 🔘 Heat Transfer but no Solar Gain (Partition).
-
In Wall, set Wall Type ▾ to WD - GWB - R19.
-
Press the button to close the dialog box.
-
Run the
Match Wall Properties command.
Ribbon:DM HVAC→Rooms and Walls→  Match Wall Properties
Pulldown Menu:DM HVAC→Building Definition→Walls→Match Wall Properties -
Copy the properties of the wall you just defined to the remaining walls.

Define Floor/Ceiling Partitions
-
Run the
Edit Rooms command. The Room List dialog box will open.
Ribbon:DM HVAC→Rooms and Walls→  Edit Rooms
Pulldown Menu:DM HVAC→Building Definition→Rooms→Edit Rooms -
Press the button and select the Bait and Switch Room.
noteYou can also use the and buttons to find the room.
-
In Floor/Ceiling Partition, check the box.
-
Check the ☐ Include Partition box and make the following changes:
- Set 🔘 Percent to 100.
- Set U-Value to 0.05.
-
Press the button to save your changes.
-
Press the button to find the Mgr Office room.
-
In Floor/Ceiling Partition, check the box.
-
Check the ☐ Include Partition box and make the following changes:
- Set 🔘 Percent to 85.
- Set U-Value to 0.05.
-
Press the button to save your changes.
-
Press the button to close the dialog box.