Alignment points serve as the origin for all Design Master Plumbing objects. All pipes reference the alignment point when noting their relative location on the drawing file. This allows you to keep multiple floors and layout spaces properly aligned in both a single drawing file and across multiple drawing files. As long as you consistently locate your alignment points in the same place, the building will coordinate correctly.
Alignment points help to keep floors coordinated across drawing files, but they are also useful for keeping a single floor coordinated on a single drawing file. Plumbing drawings can become quite crowded as the various pipe systems are drawn on the floor plan. Each system can be assigned to a separate area.
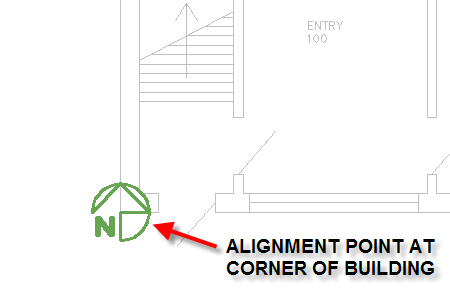
It is important to choose a good location for your alignment point. You want a point that will be easy to locate on all the floors of the building and that will not move on you during the course of the project. A corner of the build, a column, or the intersection of two architectural grids lines are all examples of good alignment point location choices. See the picture below for an example of where to insert an alignment point.
To insert an alignment point, select:
DM Plumbing4 Insert Alignment Point
The Insert Alignment Point Area dialog box will appear.
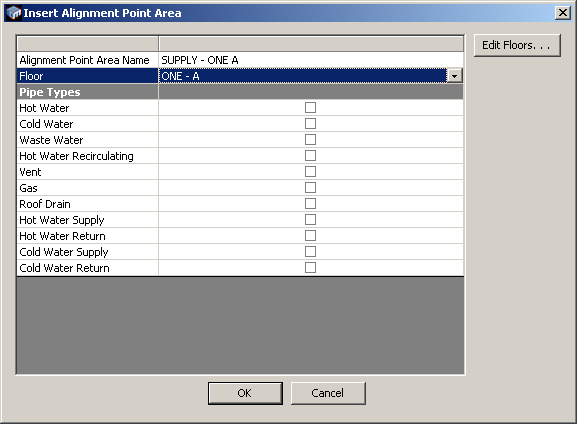
Alignment Point Area Name: the name used to refer to the alignment point. We recommend you use a consistent naming scheme to make it differentiate between alignment points.
Floor: the floor that is associated with this area. A drop down list will show all the available floors in the project.
Pipe Types: for each pipe type and floor, there is one alignment point that corresponds with them. This way, when you insert a riser across floors, you know which other alignment point areas to insert the pipe on for the other floors. You can check pipes ahead of time so that when you insert a riser and have multiple areas for each floor, it doesn't ask you which floor to use. Once you have inserted a pipe in an area, it locks that pipe type to that area, and you can't change it without first erasing the pipes in the area.
Edit Floors: this button opens the Floors dialog box and allows you to edit floor definitions.
Press OK to insert the alignment point.
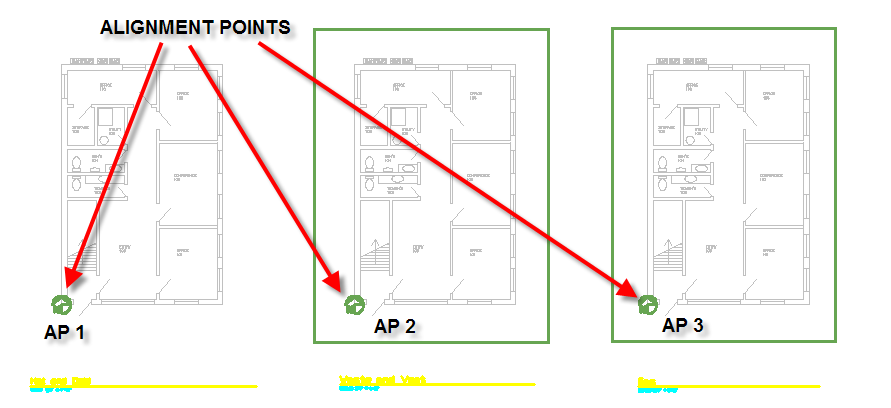
It is possible to have multiple alignment points on a single drawing file. The first alignment point is inserted normally and applies to the entire drawing file. Any additional alignment points will require an alignment point area that is specifically designated to work with the new alignment point. Here is an example of a drawing file with multiple alignment point areas and floor plans. Notice how the second and third alignment points (labeled AP2 and AP 3) have areas drawn around them.